Start (RUN) a virtual machine in the background
“C:\Program files (x86)\VMware\VMware VIX\vmrun.exe” start C:\path\vm.vmx
Convert disks
“C:\Program Files (x86)\VMware\VMware Workstation\vmware-vdiskmanager” -r D:\VM\SES01\SES01-000002.vmdk -t 2 D:\VM\SES01\HD1\SES01-000002.vmdk
Image to 2nd hard disk
- Create VHD on host with disk management
- Set it online
- Format NTFS
- Copy image to new hard disk
- detach VHD on host with disk management
- Convert VHD to VMDK with starwind v2v converter
Recover acronis image
- Use Acronis Universal Restore
- skip the noted missing drivers
- in case of w2k sp2 install KB835732
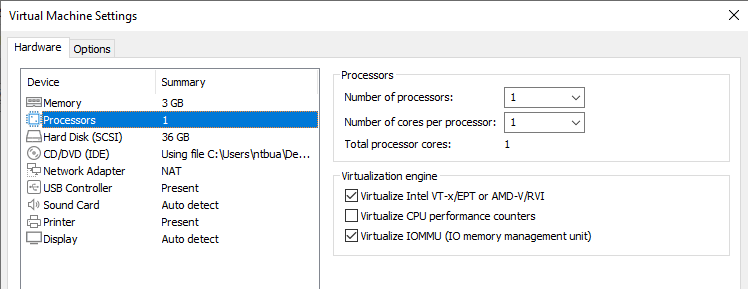
Windows 2000 install loop
To prevent an install loop I set the following setting for the processor
Convert physical machine with image program
- Image virtual machine
- Convert image to ISO
- New virtual machine with 2 CD/DVD devices
- one loaded with the image
- one loaded with the image program
- Restore image
- Boot the virtual machine
- If the HDD cannot be found try da different HDD type and couple it to the existing VMDK
- If needed KB835732
- Install VMware tools
- Remove old system software for hardware.
Convert from GHO to VMDK
ghost32 -clone,mode=restore,src=my.gho,dst=myimage.vmdk -batch -sure
Add user to Vcenter
- Create an user in the domain
- Login to VSphere center
- Permissions tab
- RMB > add permission
- add user from domain
- assign role
Installeren vmware tools debian linux
sudo apt-get install open-vm-tools-desktop
Shortcut to start a virtual machine in full screen
“C:\Program Files (x86)\VMware\VMware Workstation\vmware.exe” -X path to vmx file
Delay the VMWare toolbar
edit the following file
%APPDATA%\VMware\preferences.ini
Add
pref.fullscreen.showDelay = “10000”
ESXi configuratie backuppen en terug zetten
https://graspingtech.com/backup-vmware-esxi-6-5-configuration/ vim-cmd hostsvc/firmware/backup_config
- BACKUP
- Store the current configuration >
vim-cmd hostsvc/firmware/backup_config - Download the current configuration , See the output from the last command, fill in the IP address.
- RESTORE
- Install the same ESXi version and build
- Give the basic parameters and enable SSH
- Maintenance mode >
vim-cmd hostsvc/maintenance_mode_enter - Copy the backup to the new SD card
- PSCP “downloaded configuration” user@IP: /tmp/configBundle.tgz
- restore de configuratie >
vim-cmd hostsvc/firmware/restore_config /tmp/configBundle.tgz
New QNAP volume
- Add harddisk(s)
- Create volume
- Format Volume
- create shared folder
- NAS1_….
- Specify path automatically
- Specify rights for the new volume
- Users and groups permissions
- admin(local groups) – read/write
- everyone(local groups) – read/write
- Guest Access Right – Full access
- NFS host access
- No limit
- NO_ROOT_SQUASH
- Users and groups permissions
Add new DataStore
- Datacenter
- Storage
- New Datastore
- Type – NFS
- Version – NFS3
- Name – NAS1_….
- Folder – NAS1_…..
- Server – 192.168……
- Host accessibility – all
Expand QNAP Volume
- STOP or MOVE the affected guest machines
- Storage Manager
- RAID manger
- Select Disk/Volume to expand
- Warning “All services will be stopped temporarily, are you sure to continue? > “YES”
- Select a disk you want to exchange for a bigger one.
- CHANGE
- When possible the storage manger will tell you to remove the disk.
- When possible the storage manger will tell you to place the new disk.
- Rebuilding will start after a few minutes.
- When the rebuilding is done you can select the next disk to exchange
- After the last disk a button expand appear.
Remove DataStore
- ESXi > make sure nothing depents on the datastore
- ESXi > Unmount Datastore from hosts
- NAS > Shared folders > select the associated share > Remove
- NAS > Delete RAID and remove disks
Connect to HTML client
- If needed set password
- Inloggen
- Firefox as default browser
- VMWare HTML client starten
- advanced
- accept risk
- KID & password
- open remote console > allow popups
View license key
- open regedit
- Computer\HKEY_LOCAL_MACHINE\SOFTWARE\WOW6432Node\VMware, Inc.\VMware Workstation\